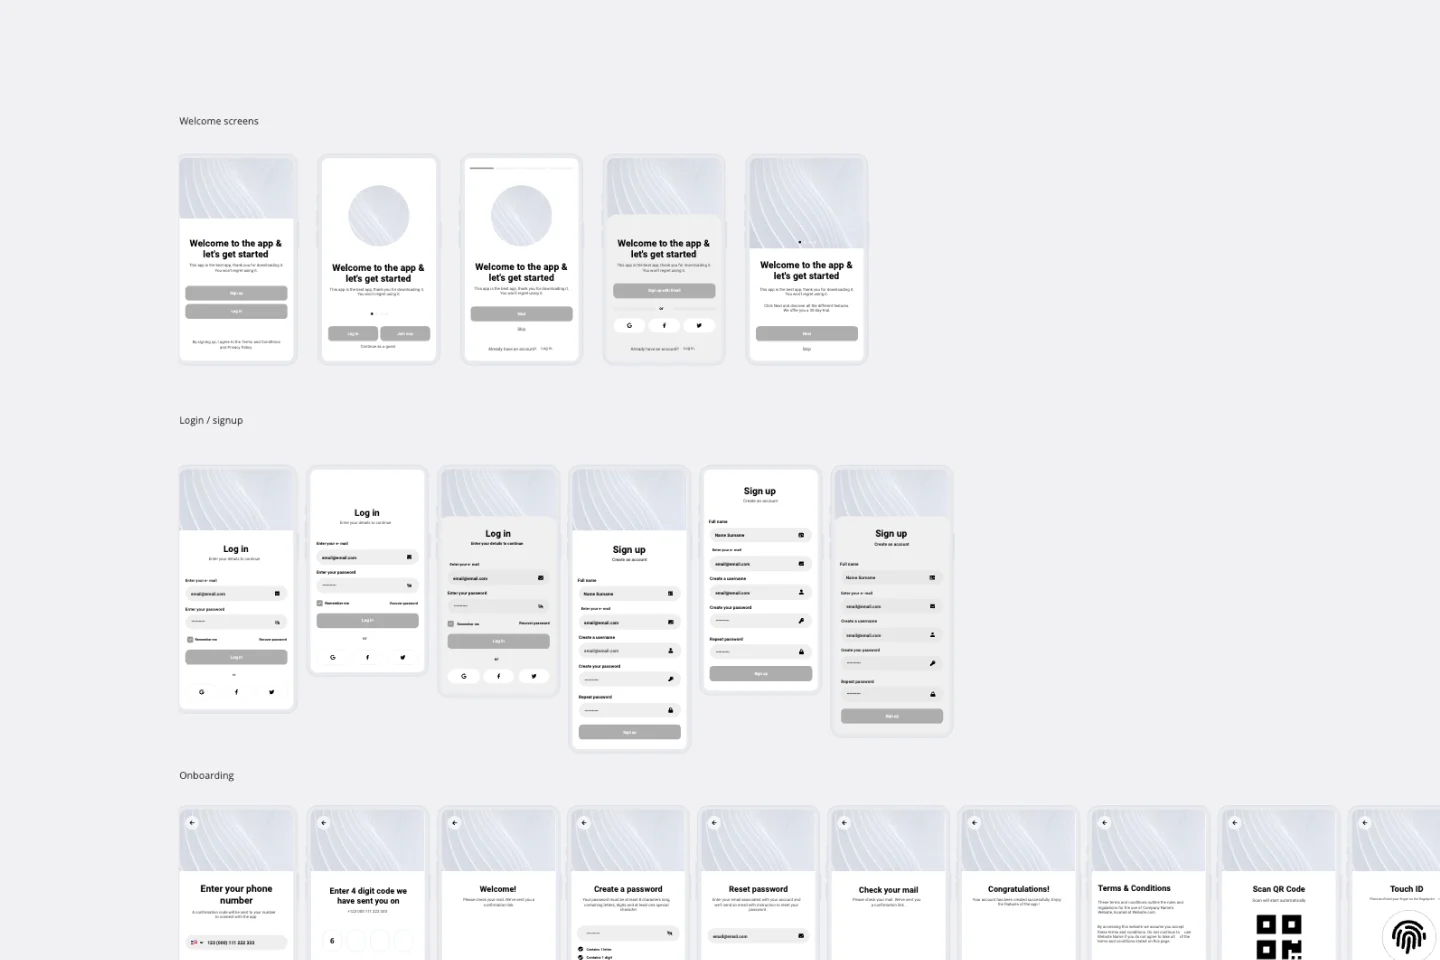
About the Website Prototype Template
Creating a website prototype is a crucial step in the web development process. It allows teams to visualize the structure, layout, and functionality of a website before diving into the actual development. Miro's website prototype template streamlines this process, offering a collaborative and intuitive platform for teams to bring their ideas to life.
Why you'll love our website prototype template
Using Miro's website prototype template comes with some benefits:
Improved collaboration: Miro's platform allows multiple team members to work on the prototype simultaneously, ensuring that everyone’s input is considered and integrated in real-time.
Time efficiency: With pre-built components and an easy-to-use interface, you can quickly create and iterate on your website prototype, saving valuable time.
Visual clarity: The templates clearly represent your website’s structure, making it easier to identify potential issues and areas for improvement early in the process.
User testing: Prototypes created in Miro can be easily shared with stakeholders and users for feedback, allowing for iterative improvements based on real user insights.
Integration with other tools: Miro seamlessly integrates with other tools you might be using, such as Jira, Slack, and Google Drive, making it a central hub for your project management and collaboration needs.
Prototyping AI capability: Miro's new prototyping AI can suggest design improvements and automate repetitive tasks, further accelerating the prototyping process.
How to use the website prototype template in Miro
Access the template: Navigate to Miro’s template library and select the website prototype template. This template provides a structured starting point with pre-defined sections for headers, footers, content areas, and more.
Customize the layout: Use Miro’s drag-and-drop interface to customize the layout according to your project’s requirements. You can add, remove, or rearrange elements to fit your vision.
Add content: Fill the prototype with content, including text, images, buttons, and other interactive elements. Miro’s intuitive tools make it easy to add and format these components.
Collaborate with your team: Invite team members to join the board. They can add comments, suggest changes, and contribute to the prototype in real-time. Use Miro’s built-in communication tools to discuss and resolve any issues.
Use Prototyping AI: Leverage Miro’s new prototyping AI to enhance your design. The AI can provide suggestions for layout improvements, detect inconsistencies, and even automate some of the design tasks, making the process more efficient.
Test and iterate: Share the prototype with stakeholders and users for feedback. Use their insights to make necessary adjustments. Miro’s version history feature allows you to track changes and revert to previous versions if needed.
Finalize the prototype: Once you’re satisfied with the prototype, you can export it or integrate it with other tools for further development. Miro’s flexibility ensures that your prototype can be easily transitioned into the next phase of your project.
How to use AI prototyping in Miro
Create a prototype with AI: Open the Create with AI panel and select "Prototype". Choose the device type for your prototype and decide whether you want to create a multi-screen flow or a single-screen prototype. Enter your prompt with as much detail as possible to generate accurate results. Click "Send" to generate your prototype on the canvas. If satisfied, click "Apply to canvas"; otherwise, click "Discard version" to start over. Extra tip: Try using the prompt for our template, 'Generate a modern banking website with a clean, professional design. Use a blue color scheme #013369 as the primary theme.'
Add context from the canvas: Enhance your AI prompt by adding context such as design briefs or sticky notes from your board. Select the relevant board content and follow the prompts in the Create with AI panel to generate a prototype that closely fits your design needs.
Refine your prototype with AI: Once your prototype draft is created, you can refine it by adding screens or editing the prototype. Enter the changes you want to make and click "Send". Repeat this process until you are satisfied with the output, then click "Apply to canvas" to finalize the prototype.
Apply styles to your prototypes: To apply the visual style from an existing website, use Miro AI to automatically apply the style. Select your prototype screens, click on the Miro AI icon in the context menu, and choose "Import style from image". Select the image file, and Miro AI will apply the style to your prototype.
Add connector lines to make a prototype interactive: AI-generated prototypes include connector lines, but you can modify or add more. Click on the element in your prototype that should lead to another screen, drag the connector line icon to the relevant screen, and a connector line will appear. In the prototype preview, clicking on a connected element will direct you to the connected screen.
Create a prototype from an existing design: If you want to iterate on an existing design, use Miro AI to convert screenshots into interactive prototypes. Add a screenshot of your existing design to the canvas, click on the screenshot to view the context menu, and select "Convert image to prototype". Choose the device type (Mobile, Tablet, or Desktop), and Miro AI will convert your design into an interactive prototype.
Miro’s website prototype template is designed to help teams thrive by providing a collaborative, efficient, and visually clear platform for creating website prototypes. With the added power of Miro’s prototyping AI, your team can streamline the design process, incorporate real-time feedback, and ensure that your final product meets the highest standards. Embrace the future of web development with Miro and watch your ideas come to life effortlessly.

Miro
Your virtual workspace for innovation
Miro is an innovation workspace designed for teams of every size, everywhere, to dream, design, and build the future together. Our mission? To empower these teams to create the next big thing, powered by AI at every step of the way. Over 90 million users around the world rely on Miro to untangle complex ideas, put customer needs first, and deliver products and services faster. All supported by best-in-class security, compliance, and scalability.
Categories
Similar templates
App Wireframe Template
App Wireframe Template
Ready to start building an app? Don’t just imagine how it will function and how users will interact with it—let a wireframe show you. Wireframing is a technique for creating a basic layout of each screen. When you wireframe, ideally early in the process, you’ll gain an understanding of what each screen will accomplish and get buy-in from important stakeholders—all before adding the design and content, which will save you time and money. And by thinking of things in terms of a user’s journey, you’ll deliver a more compelling, successful experience.
Mobile App Prototype Template

Mobile App Prototype Template
Miro's mobile app prototype template is your go-to solution for quickly and efficiently designing mobile apps, offering a collaborative and flexible framework to bring your ideas to life.
Low-Fidelity Prototype Template
Low-Fidelity Prototype Template
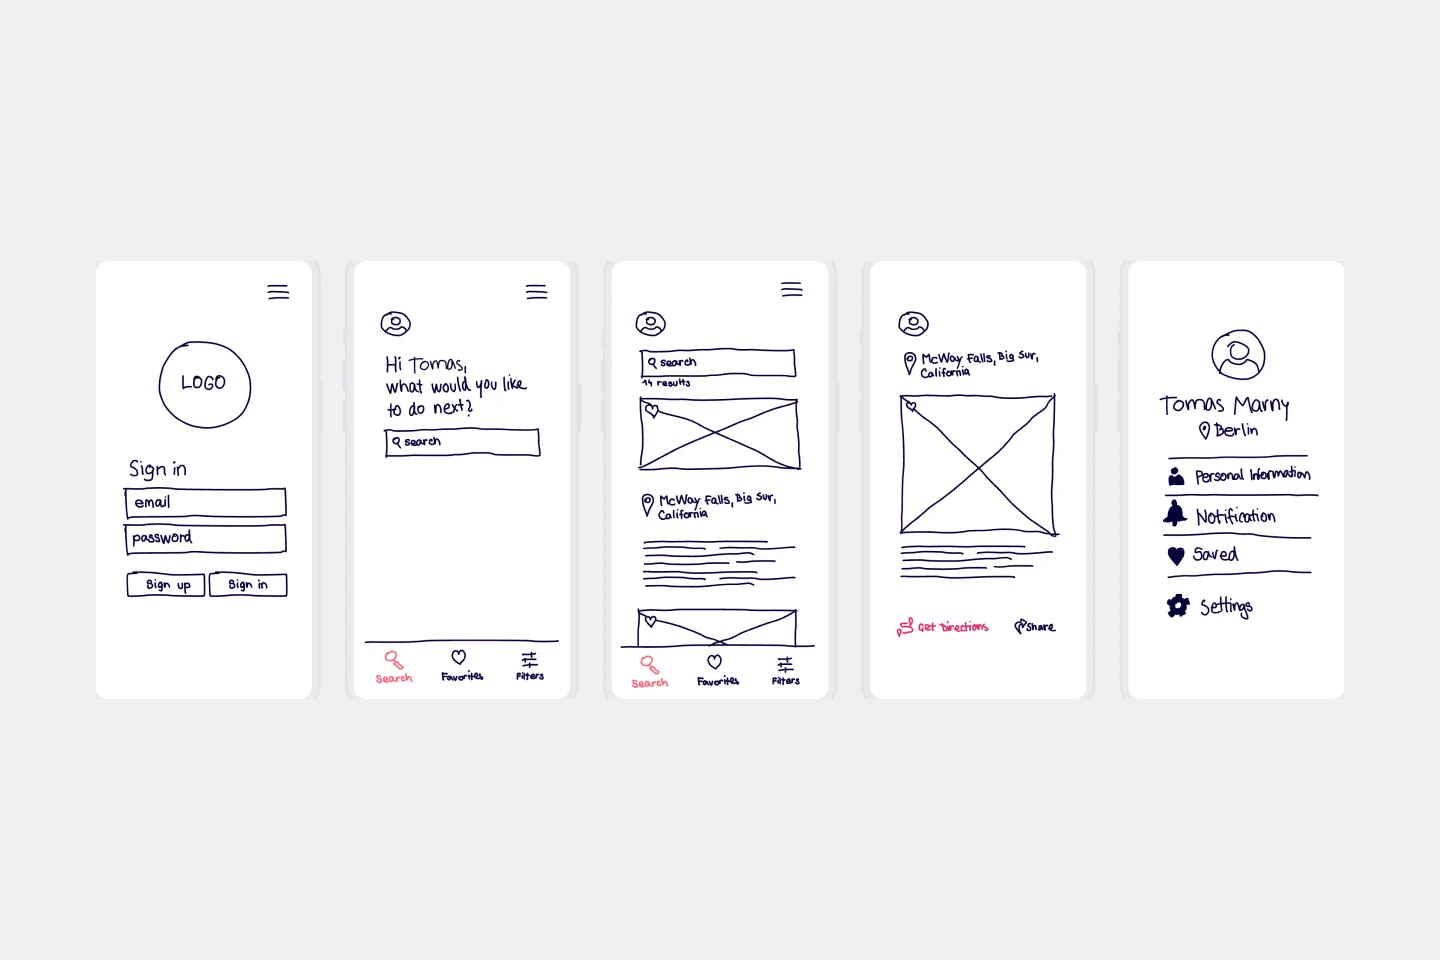
Low fidelity prototypes serve as practical early visions of your product or service. These simple prototypes share only a few features with the final product. They are best for testing broad concepts and validating ideas. Low fidelity prototypes help product and UX teams study product or service functionality by focusing on rapid iteration and user testing to inform future designs. The focus on sketching and mapping out content, menus, and user flow allows both designers and non-designers to participate in the design and ideation process. Instead of producing linked interactive screens, low fidelity prototypes focus on insights about user needs, designer vision, and alignment of stakeholder goals.
Prototype Template

Prototype Template
A prototype is a live mockup of your product that defines the product’s structure, user flow, and navigational details (such as buttons and menus) without committing to final details like visual design. Prototyping allows you to simulate how a user might experience your product or service, map out user contexts and task flows, create scenarios to understand personas, and collect feedback on your product. Using a prototype helps you save money by locating roadblocks early in the process. Prototypes can vary, but they generally contain a series of screens or artboards connected by arrows or links.
App Wireframe Template
App Wireframe Template
Ready to start building an app? Don’t just imagine how it will function and how users will interact with it—let a wireframe show you. Wireframing is a technique for creating a basic layout of each screen. When you wireframe, ideally early in the process, you’ll gain an understanding of what each screen will accomplish and get buy-in from important stakeholders—all before adding the design and content, which will save you time and money. And by thinking of things in terms of a user’s journey, you’ll deliver a more compelling, successful experience.
Mobile App Prototype Template
Mobile App Prototype Template
Miro's mobile app prototype template is your go-to solution for quickly and efficiently designing mobile apps, offering a collaborative and flexible framework to bring your ideas to life.
Low-Fidelity Prototype Template
Low-Fidelity Prototype Template
Low fidelity prototypes serve as practical early visions of your product or service. These simple prototypes share only a few features with the final product. They are best for testing broad concepts and validating ideas. Low fidelity prototypes help product and UX teams study product or service functionality by focusing on rapid iteration and user testing to inform future designs. The focus on sketching and mapping out content, menus, and user flow allows both designers and non-designers to participate in the design and ideation process. Instead of producing linked interactive screens, low fidelity prototypes focus on insights about user needs, designer vision, and alignment of stakeholder goals.
Prototype Template
Prototype Template
A prototype is a live mockup of your product that defines the product’s structure, user flow, and navigational details (such as buttons and menus) without committing to final details like visual design. Prototyping allows you to simulate how a user might experience your product or service, map out user contexts and task flows, create scenarios to understand personas, and collect feedback on your product. Using a prototype helps you save money by locating roadblocks early in the process. Prototypes can vary, but they generally contain a series of screens or artboards connected by arrows or links.