Mermaid diagrams: Everything you need to know

Summary
In this guide, you will learn:
What Mermaid is and how it uses text-based syntax for diagrams
Mermaid diagram types and their use cases
How to install and use the Mermaid app in Miro
Step-by-step editing, previewing, and adding Mermaid diagrams to Miro
How Mermaid integrates with other tools
Best practices for efficient Mermaid syntax
Try Miro now
Join thousands of teams using Miro to do their best work yet.
If you're a developer on a product team, you've probably faced the challenge of conveying complex ideas visually. Whether it's mapping out a new feature, designing an architecture, or planning a workflow, clarity is key. That's where Mermaid diagrams come into play. Mermaid offers a way to create diagrams using a simple, markdown-inspired syntax, and with Miro's powerful visual workspace, incorporating these diagrams into your collaborative efforts has never been easier.
Getting started with Mermaid diagrams
Imagine you're in the middle of a sprint planning session. You have a complex system design in your mind, but explaining it verbally just isn't cutting it. Enter Mermaid diagrams. With Mermaid, you can quickly turn your thoughts into clear, structured diagrams using plain text. No more dragging and dropping shapes endlessly. Simply type out your diagram in Mermaid's syntax, and voila! A clean, professional diagram appears.
Mermaid integrates seamlessly with Miro, a visual workspace for innovation, making it the perfect tool for developers who need to visualize complex processes and collaborate in real time or asynchronously.
Exploring the different types of Mermaid diagrams
One of the best things about Mermaid is its versatility. It supports a wide range of diagram types, making it suitable for various aspects of product development. Let's dive deeper into each type and understand their specific use cases:
Flowcharts
Flowcharts are excellent for mapping out workflows, decision trees, and processes. They visually represent the steps in a process, showing how each step leads to the next. In a product development context, flowcharts can be used to outline the stages of a user journey, identify decision points in a process, or map out an algorithm. They help teams see the entire process at a glance, making it easier to identify bottlenecks and optimize workflows.
Sequence diagrams
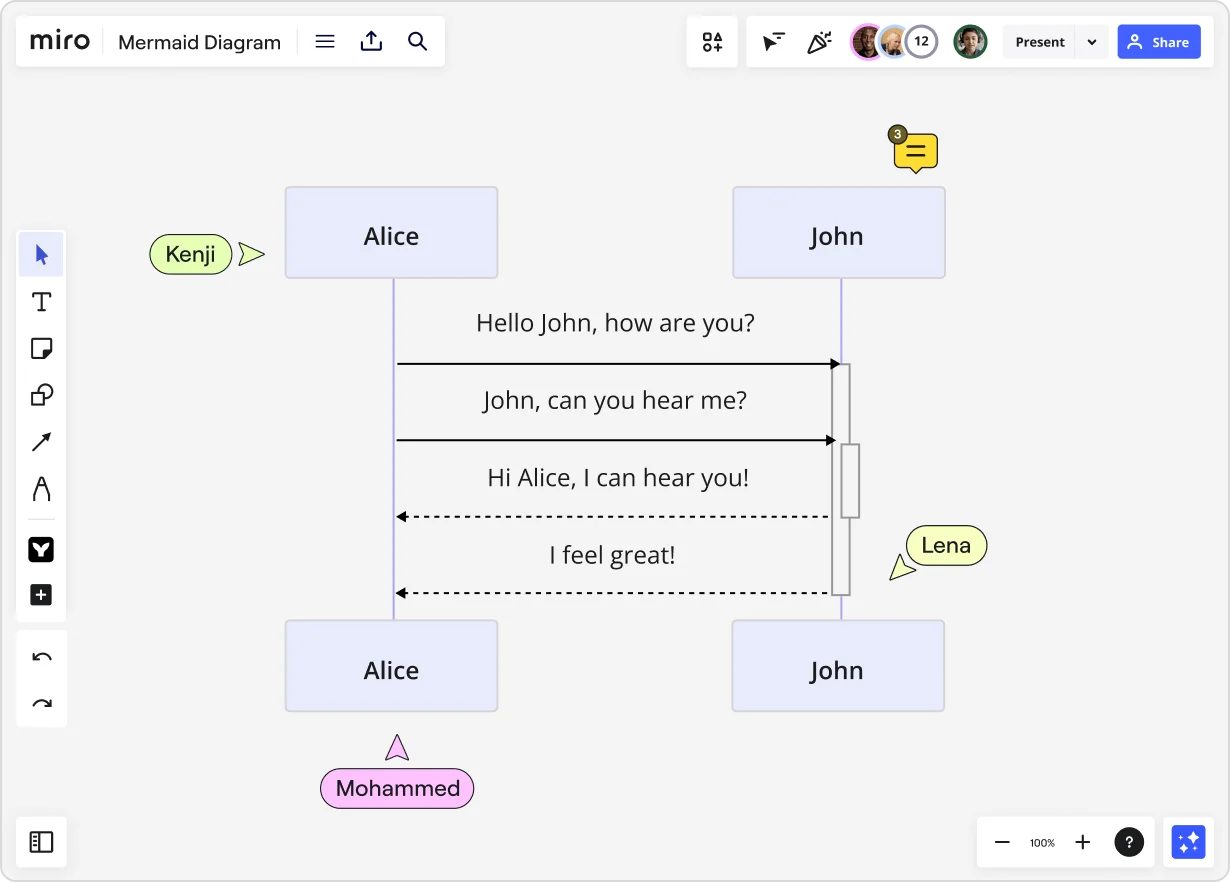
Sequence diagrams are perfect for detailing interactions between different components or systems over time. They show how objects or components interact in a particular sequence of events. For developers, sequence diagrams are invaluable for visualizing the flow of messages between system components, understanding complex interactions in microservices architectures, or illustrating the sequence of API calls. This helps ensure all team members have a clear understanding of system interactions.
Entity-Relationship diagrams
Entity-Relationship (ER) diagrams are used for database design and illustrating relationships between data entities. They depict entities (such as tables) and the relationships between them. ER diagrams are essential for designing a robust database schema, helping teams visualize the structure of the database, understand how data is connected, and ensure data integrity. They are particularly useful during the initial stages of database design or when making significant changes to the database structure.
Gantt charts
Gantt charts are great for project planning and tracking timelines. They visually represent the start and end dates of project tasks, along with their dependencies. In product development, Gantt charts help teams plan and schedule projects, allocate resources, and track progress. They provide a clear timeline of tasks, making it easier to manage deadlines and ensure projects stay on track.
C4 diagrams
C4 diagrams visualize software architecture at different levels of detail. They break down the architecture into Containers, Components, and Code, providing a comprehensive view of the system. C4 diagrams help developers and architects understand the overall structure of the system, identify components and their interactions, and ensure the architecture aligns with business requirements. They are particularly useful for onboarding new team members or communicating architectural decisions to stakeholders.
How to create a Mermaid diagram in Miro

Creating Mermaid diagrams in Miro is a breeze. Here's a detailed guide to get you started:
Step 1: Install the Mermaid app
Head over to the Miro Marketplace and install the Mermaid app. Once installed, it will appear in your Creation toolbar. This app allows you to create and edit Mermaid diagrams directly within Miro.
Step 2: Open the Mermaid editor
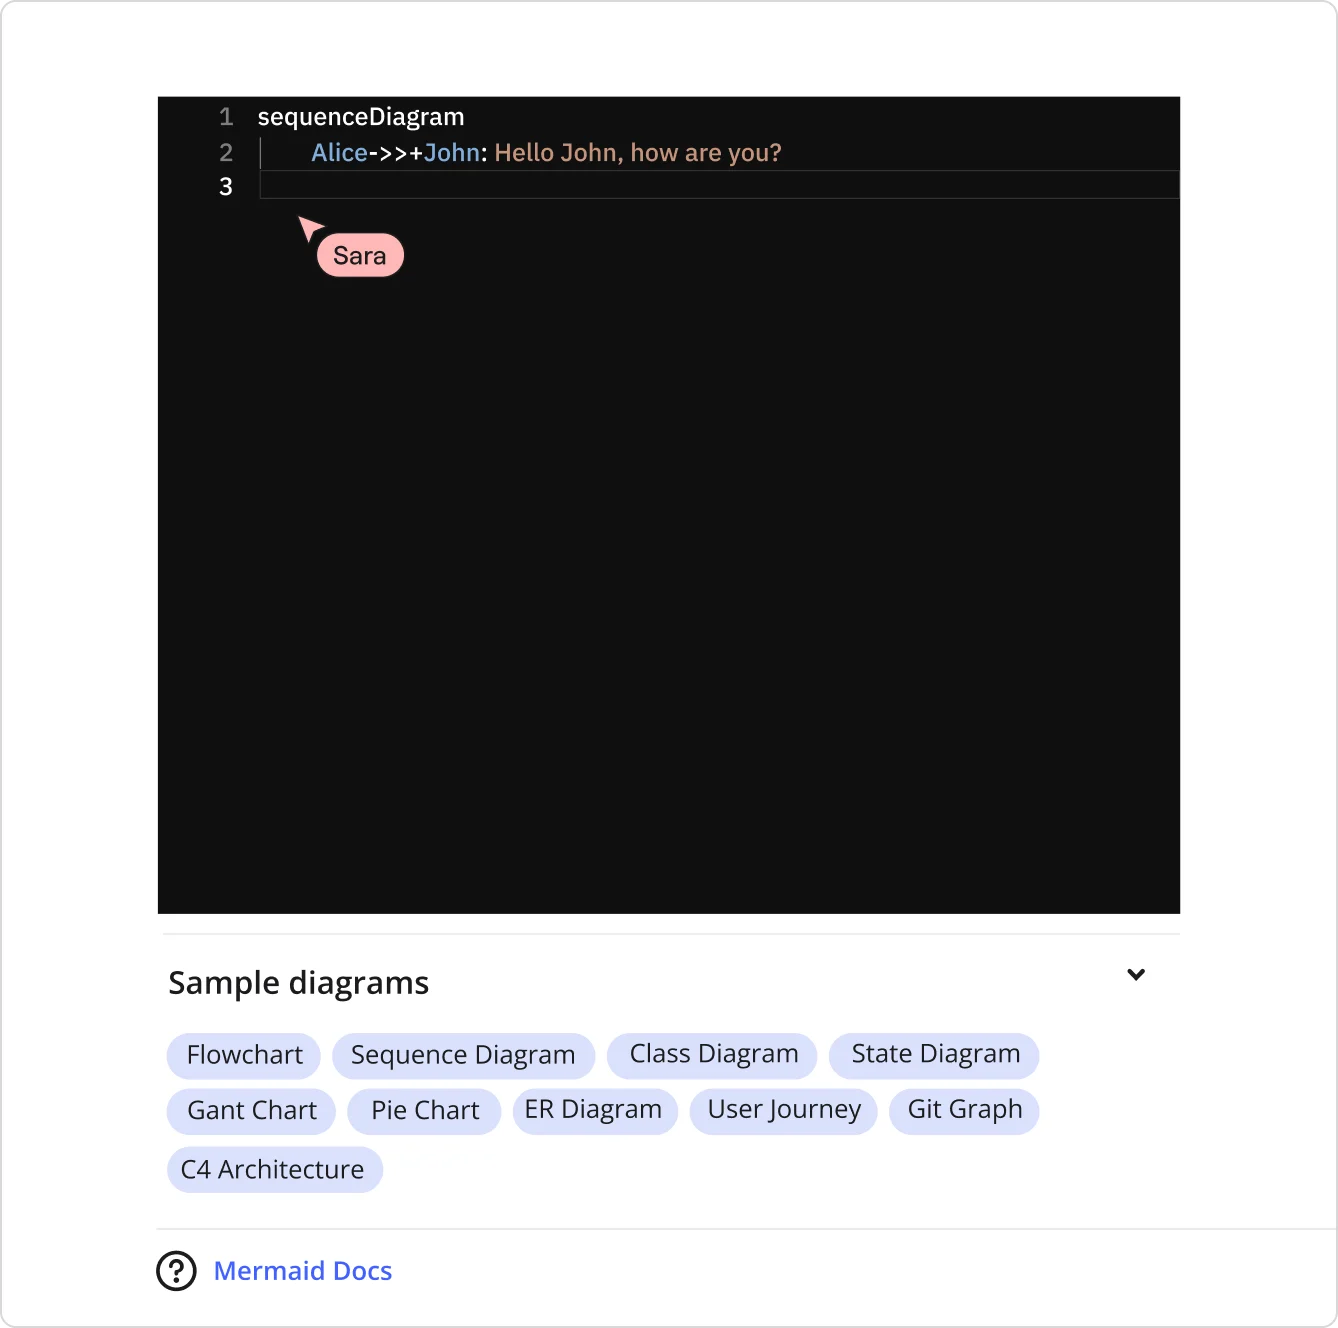
Click the Mermaid icon in the Creation toolbar to open the editor. You'll see a default sample code ready for editing. The editor provides a simple interface where you can write and preview your Mermaid diagrams.
Step 3: Edit your diagram
Use the Mermaid syntax to create your diagram. The syntax is straightforward and markdown-inspired, making it easy to learn and use. The code editor pane is adjustable, allowing you to work comfortably with larger diagrams. You can start by modifying the sample code or writing your own from scratch.
Step 4: Preview and refine
As you edit the code, the diagram will refresh in the preview area. This real-time preview feature allows you to see changes instantly, making it easier to refine and adjust your diagram until it meets your needs. You can zoom in and out of the preview to get a better view of your diagram.
Step 5: Add to your board
Once your diagram is complete, add it to your Miro board as an image. This integration allows you to incorporate Mermaid diagrams into your larger projects, presentations, or collaborative boards. You can now download the image, share it with your team, or include it in documentation.
With Miro's Mermaid app, the design and layout of your diagrams are automatically applied, allowing you to focus on content rather than aesthetics.
Tips and tricks for using Mermaid diagrams
Here are some pro tips to help you make the most of Mermaid diagrams in Miro:
Reuse code snippets
Save and reuse common diagram components by copying code snippets from other sources like GitHub or Notion directly into Miro. This approach not only saves time but also ensures consistency across your diagrams. By building a library of reusable code snippets, you can quickly assemble complex diagrams without starting from scratch each time.
Leverage templates
Take advantage of the sample diagrams provided in the Mermaid app. These templates can serve as a great starting point for your own diagrams, providing a foundation that you can customize to fit your specific needs. Templates help you get up and running quickly, especially when you need to create standard diagram types frequently.
Collaborate in real time
Use Miro's real time collaboration features to co-create diagrams with your team. Multiple users can edit the diagram code simultaneously, making it easy to brainstorm ideas, make adjustments, and reach consensus faster. Real-time collaboration ensures everyone is on the same page and can contribute to the diagram's development.
Integrate with Miro AI
Miro AI can help you automate the creation and refinement of your diagrams, making the process even more efficient. By leveraging AI-powered suggestions and enhancements, you can streamline the diagramming process, ensure accuracy, and focus on higher-level design and analysis tasks.
Stay updated
Check the official Mermaid documentation regularly for updates on new features and syntax enhancements. Staying informed about the latest developments in Mermaid ensures you can fully take advantage of its capabilities and apply best practices in your diagramming work.
Mermaid diagrams examples and inspiration
To spark your creativity, here are some examples of how product teams can use Mermaid diagrams in Miro:
Feature workflow
Create a flowchart to outline the steps involved in developing a new feature, from ideation to deployment. Start by mapping out each stage of the development process, including requirements gathering, design, implementation, testing, and release. Highlight decision points and potential bottlenecks to ensure a smooth workflow. This visual representation helps the team understand the overall process and identify areas for improvement.
API interaction
Use a sequence diagram to illustrate the interactions between different APIs and services within your application. Begin by identifying the components involved in the interaction and the sequence of messages exchanged between them. This diagram can help developers understand how different parts of the system communicate, identify potential issues, and ensure the API interactions are correctly implemented.
Database schema
Design an entity-relationship diagram to map out the structure of your database, showing tables and their relationships. Start by listing the main entities in your database and their attributes. Then, define the relationships between these entities, such as one-to-many or many-to-many relationships. This diagram provides a clear overview of your database design, helping ensure data integrity and efficient querying.
Project timeline
Plan your next project with a Gantt chart, visualizing the timeline and dependencies of various tasks. Begin by listing all the tasks required to complete the project and their estimated durations. Arrange these tasks on a timeline, showing their start and end dates. Highlight dependencies between tasks to identify critical paths and ensure timely completion. This visual tool helps the team stay organized and track progress effectively.
System architecture
Use C4 diagrams to present a high-level overview of your system architecture, breaking it down into containers, components, and code. Start by identifying the main containers (such as web servers, databases, and external systems) and their interactions. Then, detail the components within each container and how they communicate. This layered approach provides a comprehensive understanding of the system architecture, aiding in decision-making and communication with stakeholders.
Best practices for Mermaid diagrams
To ensure your Mermaid diagrams are as effective as possible, follow these best practices:
Keep it simple
Focus on clarity and simplicity. Avoid overloading your diagrams with too much detail. A clean, straightforward diagram is easier to understand and more effective in communicating your message. Use only the necessary elements to convey your idea, and break down complex diagrams into smaller, manageable parts.
Use meaningful labels
Ensure that all elements in your diagrams are clearly labeled and easy to understand. Meaningful labels help the audience quickly grasp the content and purpose of the diagram. Avoid using jargon or abbreviations that might be confusing, and provide additional context where needed.
Maintain consistent styling
Maintain a consistent style throughout your diagrams to enhance readability and professionalism. Consistency in fonts, colors, and shapes helps the audience follow the diagram more easily. Use a predefined style guide or template to ensure uniformity across all your diagrams.
Validate your syntax
Regularly check your Mermaid syntax for errors to avoid rendering issues. Even small syntax errors can result in incomplete or incorrect diagrams. Use the preview feature in Miro to validate your code and ensure the diagram renders as expected before sharing it with others.
Solicit feedback
Share your diagrams with colleagues and solicit feedback to identify areas for improvement. Peer reviews can provide valuable insights and help you refine your diagrams. Encourage team members to suggest changes or highlight unclear elements, ensuring the final diagram is accurate and comprehensible.
By incorporating these best practices, you'll create diagrams that not only convey information effectively but also enhance your team's productivity and collaboration.
With these insights, you’re well-equipped to start using Mermaid diagrams in Miro to their fullest potential. Whether you're mapping out workflows, designing systems, or planning projects, Mermaid diagrams offer a powerful way to visualize your ideas. And with Miro's robust visual workspace, collaborating on these diagrams has never been easier. Happy diagramming!
Author: Miro Team
Last update: October 14, 2025