Table of contents
Table of contents
How to design a database schema in 7 steps
Summary
In this guide, you will learn:
The importance of analyzing database requirements.
How to choose the right database model.
How to create an entity-relationship diagram (ERD).
The process of normalizing the database schema.
Steps to design, implement, test, and refine database tables.
How Miro’s database design tools facilitate collaborative diagramming and integration.
Try Miro now
Join thousands of teams using Miro to do their best work yet.
Want to learn how to design a database schema? You're in the right place.
Database schemas act as blueprints that define a system's structure, relationships, and rules. They outline the logical arrangement of tables, attributes, and their interconnections — crucial for data accuracy, performance enhancement, and simpler maintenance.
In this guide, we'll walk you through seven simple steps on how to create a robust database schema. We’ll also share a few tips on how you can simplify your workflow using Miro’s database design tools.
Let’s get started.
Step 1: Analyze database requirements
Before you start designing a database schema, it’s worth clearly understanding what you need your database to achieve. Here are some important factors to keep in mind:
Project scope: Start by outlining the project’s goals and objectives to ensure your schema meets the specific needs of your business.
Data gathering: Gather information from stakeholders to ensure you capture all the important details.
Entity specification: Define the entities and attributes clearly. This step helps identify the key data elements that will be represented in your schema.
Step 2: Choose the right database model
Choosing the right database model is crucial when creating your schema. Start by evaluating different models such as relational, NoSQL, and others, based on your project’s specific needs and scalability requirements.
Look for a model that seamlessly aligns with how your application handles data and accesses information. This ensures a smooth integration between your schema and the software it supports.
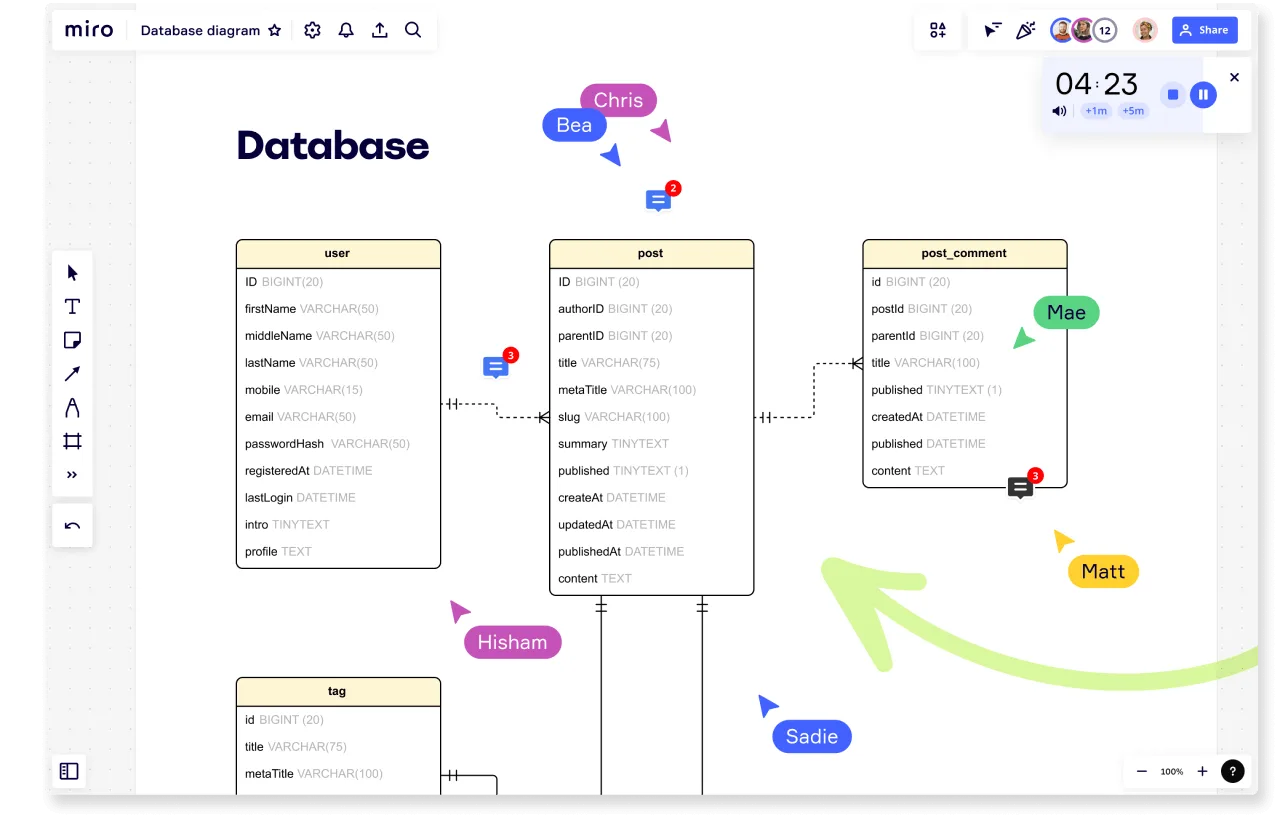
Step 3: Create an entity-relationship diagram (ERD)
Developing an entity-relationship diagram (ERD) is important for visualizing and designing your database schema. Utilize tools like Miro’s ER diagram tool to construct your ERD efficiently.
An ERD helps illustrate entities, attributes, and their relationships in a clear and intuitive manner. Follow standardized notation and symbols to maintain consistency and ensure easy understanding among all stakeholders.
TIP: Save time using Miro’s customizable Entity Relationship Diagram Template.
Step 4: Normalize the database schema
Normalization is the process of organizing data to reduce redundancy and improve data integrity. This involves breaking down larger tables into smaller, related tables to make sure each piece of data is stored in only one place.
Here are the typical stages of normalization:
First Normal Form (1NF): Helps make sure that each column contains atomic (indivisible) values.
Second Normal Form (2NF): Building on 1NF by making sure all non-key attributes fully depend on the primary key.
Third Normal Form (3NF): Further refining the structure by eliminating transitive dependencies between columns.
Step 5: Design database tables
Designing database tables is crucial for optimizing your schema. Follow industry best practices to achieve efficient data storage and retrieval.
For instance, document each table clearly, detailing columns, data types, relationships, and constraints. It’s also worth carefully defining primary keys, foreign keys, and indexes to maintain data integrity and streamline data access.
Step 6: Implement data relationships
Creating seamless relationships is important for building a cohesive and interconnected database schema. Define relationships such as one-to-one, one-to-many, and many-to-many to accurately represent data dependencies and ensure a well-organized and efficient database structure.
TIP: Designing your database schema in Miro? Use connection lines to visualize relationships.
Step 7: Test and refine
Before putting your schema into use, thoroughly test it with sample data. This process helps identify and resolve any issues that may arise. Continuously testing and refining your schema ensures it meets the evolving needs of your application.
TIP: Get feedback from your team to make the best possible refinements. If you’re working in Miro, choose from plenty of powerful ways to collaborate and get feedback — from inviting someone to view and comment on your Miro board to recording an interactive video walkthrough and sharing it.
Design your database schema in Miro
Now that you know how to design a database schema, it’s time to create your own.
With Miro’s intuitive database design tools, powerful collaboration features, and plenty of templates to get you started, you’ll have everything you need to create your best work. But why not see for yourself?
Sign up for Miro to get started.
Author: Miro Team
Last update: October 7, 2025